Anúncios
Can a single image or video truly transform the way we perceive a travel destination? The answer lies in the art of capturing the perfect visual angle.
Effective destination marketing relies heavily on showcasing a location’s unique charm. By employing innovative photography techniques and video production strategies, destinations can elevate their appeal and attract more visitors.
The right visual angles can make all the difference, turning an ordinary scene into an extraordinary one. As we explore the world of destination marketing, we’ll delve into the techniques that make a destination truly unforgettable.
Why Visual Angles Transform Destination Appeal
Transforming a destination’s appeal often starts with the visual angle chosen to represent it. The way a place is captured through photography or videography can significantly influence potential travelers’ perceptions and decisions.
Visual storytelling is a powerful tool in tourism marketing. By using the right visual angles, destinations can be presented in a way that highlights their unique features and attractions. For instance, a low-angle shot can make a landmark appear grand and imposing, while a high-angle shot can provide a breathtaking view of the surrounding landscape.
Anúncios
- Creating an emotional connection through unique perspectives
- Highlighting the destination’s natural beauty or cultural significance
- Providing an immersive experience through dynamic video angles
Effective visual storytelling involves more than just pointing a camera at a destination. It requires careful consideration of the visual angles that will best capture its essence and appeal to potential visitors. By doing so, tourism marketers can create compelling narratives that drive interest and inspire travel.
The impact of visual angles on destination appeal cannot be overstated. As the travel industry continues to evolve, understanding the role of visual storytelling in shaping traveler perceptions will become increasingly important.
The Power of Golden Hour Angles in Destination Photography
Destination photographers often seek the golden hour for its soft, warm light that enhances the beauty of any location. This period, just before sunset or after sunrise, offers a unique opportunity to capture images with a distinct, warm glow.
Anúncios
Capturing Morning Light from Low Eastern Angles
Capturing the morning light from low eastern angles can add a dramatic touch to your destination photography. The gentle, golden light casts long shadows, creating depth and dimension in your images. To maximize this effect, photographers should position themselves to face east, capturing the sunrise over the landscape.
- Use a low angle to emphasize the foreground and create a sense of scale.
- Experiment with different compositions to incorporate the golden light.
- Consider using a golden hour photography guide to plan your shoot.
Maximizing Evening Warmth with Western Perspectives
As the day comes to a close, the western perspective offers another opportunity to capture stunning images. By facing west, photographers can take advantage of the warm, golden light of the setting sun. This light is particularly effective for creating warm, inviting atmospheres in your photographs.
“The golden hour is a magical time for photography, offering a light that is both warm and soft.”
Side Lighting Techniques for Dimensional Depth
Side lighting is a powerful technique for adding depth and dimension to your destination photography. By positioning yourself so that the light comes from the side, you can create interesting shadows and highlights that add texture to your images.
- Identify the direction of the golden hour light.
- Position yourself to capture the light from the side.
- Experiment with different angles to achieve the desired effect.
By mastering the art of golden hour photography, destination photographers can elevate their work, capturing images that are not only visually stunning but also rich in depth and atmosphere.
Aerial and Drone Perspectives That Reveal Hidden Beauty
The advent of drone photography has transformed destination marketing, offering breathtaking aerial views that captivate potential travelers. By capturing destinations from unique angles, drone technology provides an immersive experience, showcasing the natural beauty and grandeur of a location.
High Altitude Establishing Shots at 300-400 Feet
High-altitude shots provide a broad perspective, establishing the scale and grandeur of a destination. At 300-400 feet, drones can capture expansive vistas, including vast landscapes and intricate patterns that are not visible from the ground. These shots are particularly effective for showcasing the layout of a destination, including its natural features and man-made structures.
Mid-Range Perspectives at 100-200 Feet for Detail
At mid-range altitudes, drones can capture detailed views that highlight specific features of a destination. This altitude is ideal for showcasing architectural details, the texture of natural landscapes, and the interaction between people and their environment. The resulting footage is rich in detail and provides a more intimate connection to the location.
Low-Altitude Cinematic Sweeps Under 100 Feet
Low-altitude shots offer a cinematic quality, with the ability to sweep through landscapes or over structures, creating a dynamic and immersive experience. These shots are particularly effective for highlighting the texture and detail of a destination’s features, drawing the viewer’s eye through the scene.
Safety and Legal Considerations for Aerial Shots
While drone photography offers numerous benefits, it’s crucial to consider safety and legal aspects. Operators must adhere to local regulations, including altitude restrictions and no-fly zones. Ensuring the drone is in good working condition and maintaining a safe distance from people and structures are also paramount. By doing so, drone photography can be both a safe and effective tool for capturing stunning aerial views.
Eye-Level Angles That Build Authentic Connections
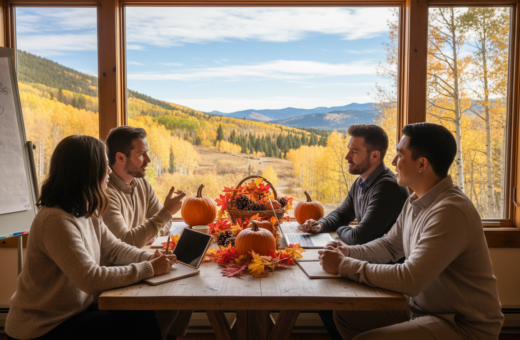
Capturing a destination through eye-level angles can significantly enhance the authenticity of the visual experience. By shooting at eye level, photographers and videographers can create content that resonates with viewers on a personal level. This technique is particularly effective in street photography, walking tours, and interior compositions.
Street Photography at 5-6 Feet for Relatability
Street photography at eye level, typically around 5-6 feet, allows viewers to connect with the scene more intimately. This height provides a relatable perspective, making the viewer feel as though they are part of the environment. Some key benefits include:
- Creating a sense of familiarity
- Capturing genuine moments
- Enhancing viewer engagement
Walking Tour Video Angles That Immerse Viewers
For walking tours, using eye-level angles can create an immersive experience. By keeping the camera at a natural height, the viewer feels as though they are walking alongside the guide, enhancing the sense of presence and engagement. Techniques include:
- Maintaining a consistent eye-level angle
- Using smooth transitions between scenes
- Incorporating interactive elements
Restaurant and Interior Eye-Level Compositions
When capturing restaurant and interior spaces, eye-level compositions can make the viewer feel more comfortable and familiar with the environment. This angle helps in showcasing the details and ambiance of the space in a way that feels natural and inviting. Consider:
- Highlighting architectural details
- Capturing the decor and ambiance
- Showcasing the overall layout
By incorporating eye-level angles into destination photography and videography, creators can build a more authentic connection with their audience. Whether through street photography, immersive walking tours, or inviting interior compositions, eye-level angles offer a powerful tool for engaging viewers.
Low Angle Photography That Amplifies Grandeur
By adopting a low angle perspective, photographers can accentuate the grandeur of architectural wonders and natural formations, making them appear even more majestic and awe-inspiring.
Ground-Level Shots for Towering Landmarks
Ground-level shots are particularly effective for capturing the grandeur of towering landmarks. By positioning the camera at a low angle, photographers can create a sense of height and majesty, drawing the viewer’s eye upward to emphasize the landmark’s scale.
Tips for capturing effective ground-level shots:
- Position the camera as close to the ground as possible.
- Use a wide-angle lens to capture the entirety of the landmark.
- Pay attention to the lighting, as low-angle sun can enhance the dramatic effect.
Upward Angles That Emphasize Architecture
Upward angles are particularly useful for emphasizing the architectural details of buildings and monuments. By looking up, the camera can capture the intricate designs and patterns that might be overlooked from a higher vantage point.
The benefits of using upward angles include:
- Highlighting the vertical elements of architecture.
- Creating a sense of drama and grandeur.
- Emphasizing the textures and details of the structure.
Low Perspectives for Natural Rock Formations and Trees
Low perspectives can also be used to great effect when capturing natural rock formations and trees. By getting low to the ground, photographers can emphasize the textures and patterns of these natural wonders, creating a more immersive experience for the viewer.
Key considerations for low perspective shots of natural formations:
- Look for interesting textures and patterns.
- Experiment with different angles to find the most compelling composition.
- Consider the time of day and lighting conditions to enhance the natural colors and textures.
High Angle Shots That Provide Geographic Context
From rooftops to mountain overlooks, high angle shots give viewers a broader understanding of a destination’s layout and its place within the surrounding landscape. As Ansel Adams once said, “You don’t take a photograph, you make it.” High angle shots are a powerful way to make a photograph that tells a story about the geography of a place.
Rooftop and Observation Deck Angles
Rooftops and observation decks offer ideal vantage points for capturing high angle shots of urban landscapes. These elevated viewpoints allow photographers to frame the cityscape, highlighting the relationship between buildings, streets, and other geographical features. For instance, a rooftop shot can capture the juxtaposition of modern skyscrapers against historic districts, providing a visual narrative of the city’s evolution.
Hill and Mountain Overlook Perspectives
For destinations surrounded by natural beauty, hill and mountain overlooks provide breathtaking high angle perspectives. These vantage points allow photographers to capture the interplay between the destination and its natural surroundings. For example, a hilltop view can reveal how a coastal town is nestled between the sea and the mountains, offering a comprehensive view of the locale’s geography.
“The world is a book, and those who do not travel read only one page.” –
Balcony Shots for Urban Street Scenes
Not all high angle shots require dramatic elevation changes. Balconies, especially those on higher floors, can offer a unique perspective on urban street scenes. By capturing the activity below, photographers can convey the vibrancy and rhythm of city life. These shots can be particularly effective in showcasing the layout of streets, the flow of pedestrian traffic, and the interaction between public spaces and surrounding architecture.
High angle shots, whether from rooftops, hills, or balconies, add a layer of depth and context to destination photography, enhancing the viewer’s understanding and appreciation of the location.
Wide Angle Techniques for Breathtaking Landscapes
The art of landscape photography is significantly enhanced by the use of wide-angle techniques, which can transform ordinary scenes into extraordinary visuals. Wide-angle lenses allow photographers to capture expansive vistas, adding depth and scale to their images.
Ultra-Wide 14-24mm Shots for Expansive Vistas
Using ultra-wide lenses (14-24mm) is a powerful technique for capturing broad landscapes. These lenses enable photographers to include more of the scene in a single frame, creating a sense of vastness and grandeur.
- Include Foreground Elements: Incorporating interesting foreground elements can add depth to the image.
- Pay Attention to Horizon Lines: Ensuring the horizon is level is crucial for maintaining the image’s integrity.
- Experiment with Angles: Shooting from low or high angles can add variety to your compositions.
Foreground Framing with Wide Lenses
Foreground framing is a technique that involves using elements in the foreground to frame the main subject of the landscape. Wide-angle lenses are particularly effective for this, as they can encompass both the foreground and the background in sharp detail.
Examples of effective foreground elements include:
- Rock formations
- Flowing water
- Vegetation
Correcting Distortion While Maintaining Impact
One of the challenges of using wide-angle lenses is managing distortion, particularly at the edges of the frame. While some distortion can be creatively useful, excessive distortion can detract from the image.
Techniques for correcting distortion include:
- Shooting with a level horizon: This helps minimize the appearance of distortion.
- Using lens correction profiles: Many cameras and editing software offer profiles that can correct lens-specific distortions.
- Post-processing adjustments: Adjusting the image during post-processing can help mitigate distortion effects.
By mastering wide-angle techniques, landscape photographers can significantly enhance their work, capturing breathtaking landscapes that draw viewers in and evoke a sense of wonder.
Detail Shots and Tight Framing That Tell Cultural Stories
Detail shots play a crucial role in storytelling, offering a glimpse into the heart of a destination’s culture. These intimate frames capture the essence of local traditions, crafts, and daily life, providing viewers with a deeper understanding of the place.
Close-Up Angles for Local Crafts and Food
Capturing local crafts and food through close-up angles allows for an appreciation of the intricate details and craftsmanship involved. For instance, a macro shot of a local artisan’s hands at work can reveal the skill and precision that goes into creating traditional crafts.
- Highlighting textures and patterns in local handicrafts
- Showcasing the preparation of traditional cuisine
- Focusing on the details of local markets and street food
Macro Perspectives on Architectural Details
Macro perspectives on architectural details can uncover the unique characteristics of a destination’s built environment. By zooming in on ornate carvings, intricate stonework, or decorative tiles, photographers can highlight the cultural significance and craftsmanship behind these structures.
- Capturing the intricate designs on historical buildings
- Documenting the texture and detail of local architectural styles
- Revealing the stories behind monumental structures through their details
Texture Shots That Convey Authentic Experience
Texture shots are vital in conveying the authenticity of a destination. By capturing the surface qualities of various elements such as weathered wood, rough stone, or vibrant fabrics, photographers can evoke a sensory experience, making the viewer feel more connected to the place.
Incorporating these detail shots and tight framing techniques into destination photography can significantly enhance the cultural narrative, providing a richer and more immersive experience for the audience.
Photo and Video Angles That Sell a Destination Better Through Dynamic Movement
Dynamic movement in video production can elevate the appeal of a destination. By incorporating motion into their visuals, filmmakers can create a more immersive experience for viewers, making the destination more appealing and engaging.
Smooth Tracking Shots Along Boardwalks and Trails
One effective technique for capturing dynamic movement is through smooth tracking shots along boardwalks and trails. These shots allow viewers to feel as if they are experiencing the destination firsthand.
Smooth tracking shots can be achieved using a gimbal or a dolly system, enabling the camera to follow the subject seamlessly. This technique is particularly effective in showcasing scenic pathways, beaches, or hiking trails.
“The art of filmmaking is to create a sense of immersion, and tracking shots are an excellent way to achieve this.” –
Gimbal Techniques for Fluid Walking Tours
Gimbal techniques are essential for creating fluid walking tours that capture the essence of a destination. By stabilizing the camera, gimbals allow for smooth footage even when the operator is moving.
- Use a 3-axis gimbal for optimal stabilization
- Practice walking while operating the gimbal to achieve smooth footage
- Consider using a follow focus system for precise control
Pan and Tilt Reveal Angles for Wow Moments
Pan and tilt reveal angles are used to create dramatic “wow moments” in destination videos. By slowly panning or tilting the camera, filmmakers can reveal breathtaking vistas or landmarks, building anticipation and excitement.
Hyperlapse Positioning for Time Compression
Hyperlapse positioning is a technique used to compress time, showcasing a sequence of events or a journey in a condensed format. This is achieved by taking multiple photos or short videos at regular intervals and then stitching them together.
Hyperlapse is particularly effective in capturing the movement of clouds, the progression of a day, or the flow of traffic, adding a dynamic element to the video.
Timelapse Angles for Cloud and Light Changes
Timelapse angles are used to capture the changes in clouds and light over time, creating a visually striking effect. By speeding up the footage, timelapse photography can convey the passage of time and the dynamic nature of a destination.
To achieve a compelling timelapse, consider the following:
- Choose a vantage point with an interesting foreground and sky
- Use an intervalometer to capture frames at regular intervals
- Experiment with different frame rates to achieve the desired effect
Specialized Angles for Different Destination Categories
Capturing the essence of a destination requires more than just a camera; it demands an understanding of the specialized angles that bring out its unique beauty. Different types of destinations, whether they’re beaches, mountains, urban areas, or historical sites, each have their own visual characteristics that photographers can leverage to create compelling images.
Beach Destinations: Water-Level and Shoreline Angles
Beach destinations offer a unique set of visual opportunities. Water-level shots can capture the intimacy of the shoreline, with the water lapping at the shore creating a dynamic foreground. Shoreline angles, on the other hand, provide a broader perspective, often incorporating elements like piers or beach umbrellas to add context.
Mountain Locations: Ridge Lines and Valley Perspectives
In mountainous regions, ridge line shots can emphasize the grandeur and scale of the landscape. Capturing from a high vantage point, photographers can showcase the vast expanse of the mountains. Conversely, valley perspectives offer a glimpse into the serene and often lush environments nestled between peaks.
Urban Environments: Symmetry and Leading Lines
Urban environments are rich with opportunities for symmetry and leading lines. Photographers can utilize the reflective surfaces of modern architecture to create symmetrical compositions. Leading lines, often found in the form of roads, staircases, or walkways, guide the viewer’s eye through the image, adding depth and dynamism.
Historical Sites: Respectful Framing and Context Shots
When capturing historical sites, it’s essential to employ respectful framing that honors the site’s significance. This might involve using a respectful distance or avoiding intrusive elements in the frame. Context shots that include surrounding environment or people interacting with the site can provide a richer understanding of its importance.
Technical Settings and Equipment for Angle Perfection
Achieving the perfect angle in photography requires a combination of technical knowledge and the right equipment. Mastering the technical aspects of photography is crucial for capturing stunning visuals that appeal to viewers.
Camera Settings for Low Light High Angles
When shooting from high angles in low light conditions, adjusting camera settings is vital. Increasing the ISO can help brighten the image, but it may introduce noise. Using a wide-aperture lens can also help by allowing more light to enter the camera. However, it’s essential to balance these settings to maintain image quality.
For high-angle shots, a slower shutter speed might be necessary, but this can lead to blur if not managed properly. Using a tripod can help stabilize the camera, allowing for sharper images even at slower shutter speeds.
Lens Selection Based on Shooting Height and Distance
The choice of lens significantly affects the outcome of a photograph. For high-angle shots, a wide-angle lens can capture more of the scene, providing context and depth. When shooting from a distance, a telephoto lens is more appropriate as it can isolate the subject and compress the perspective.
- Wide-angle lenses (between 10-24mm) are ideal for capturing broad scenes from high angles.
- Telephoto lenses (70-200mm or more) are better suited for distant subjects, providing a compressed perspective.
Stabilization Gear for Various Angle Types
Stabilization gear is crucial for maintaining the quality of photos and videos, especially when shooting from unique angles. For static shots, a tripod provides the necessary stability. For moving shots, gimbals or sliders can help achieve smooth footage.
Tripods Versus Monopods for Static Angles
For static angles, tripods are generally preferred due to their stability. However, monopods offer more flexibility and are easier to carry, making them a good alternative when mobility is required.
Gimbals and Sliders for Moving Shots
When it comes to moving shots, gimbals are invaluable for their ability to smooth out camera movements. Sliders add another dimension by allowing the camera to move smoothly along a track, creating dynamic footage.
By mastering these technical settings and equipment, photographers can achieve the perfect angle, enhancing the visual appeal of their work.
Building Your Complete Visual Angle Strategy
To truly showcase a destination, one must first build a complete visual angle strategy. This involves careful planning and consideration of various visual elements that will come together to tell a compelling story.
Creating a Diverse Shot List Before You Travel
Before embarking on a trip, it’s essential to create a diverse shot list that covers various aspects of the destination. This list should include a mix of wide, medium, and tight angles to capture the full essence of the location.
- Wide-angle shots to capture expansive landscapes
- Medium shots to highlight specific features or activities
- Tight shots to focus on details such as local crafts or cuisine
Balancing Wide, Medium, and Tight Angles
Balancing different angles is crucial for creating a visually appealing narrative. Wide angles provide context, medium angles offer detail, and tight angles add intimacy to the story.
- Use wide angles to establish the setting
- Employ medium angles to guide the viewer through the scene
- Utilize tight angles to emphasize key elements or emotions
Sequencing Angles for Compelling Video Narratives
The sequencing of angles is vital for creating compelling video narratives. By carefully ordering shots, you can build a narrative that flows smoothly and engages the viewer.
Consider the following when sequencing your shots:
- Start with an establishing shot to set the context
- Follow with a series of shots that build on the narrative
- End with a shot that leaves a lasting impression
By following these guidelines and creating a comprehensive visual angle strategy, you can effectively showcase a destination and captivate your audience.
Conclusion
The use of diverse photography techniques has been shown to significantly impact tourists’ intentions to visit destinations. By incorporating a range of visual angles and styles, destination marketers can create compelling narratives that captivate potential visitors. Effective visual storytelling enhances the appeal of a destination, making it more relatable and desirable.
Mastering various photography techniques, from golden hour angles to aerial drone shots, allows marketers to showcase destinations in the most captivating way. This not only elevates the destination’s visual identity but also plays a crucial role in destination marketing strategies. By understanding and applying these techniques, marketers can create engaging content that resonates with their target audience.
Ultimately, the strategic use of visual angles and photography techniques is vital for creating successful destination marketing campaigns. As the tourism industry continues to evolve, the importance of high-quality visual content will only continue to grow, making it essential for marketers to stay at the forefront of visual storytelling.